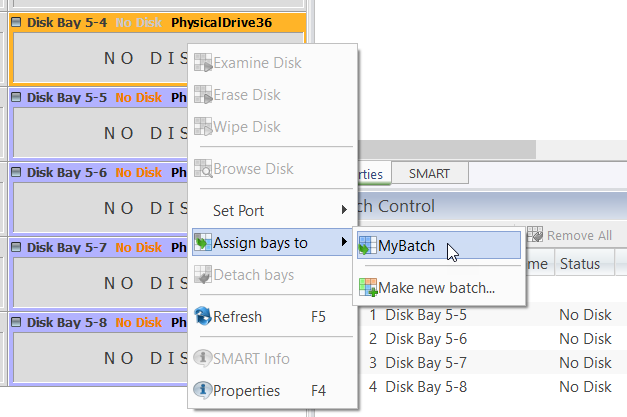
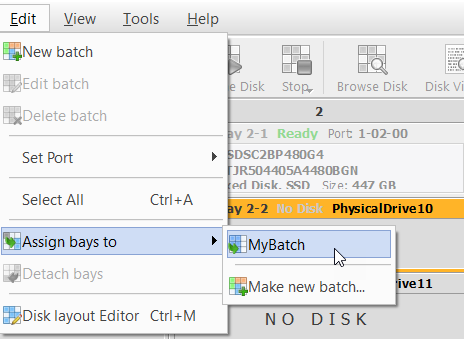
Disk Bays can be assigned to existing disk batches in order to apply same batch attributes for selected tasks (disk examination, erasure, etc).
Single disk bay can only belong to the one batch.
Once a new batch is created, a new message will appear at the top of the Disk Bays view of the Disk Explorer window, prompting you to add disks to the new batch.
Figure: Adding disks to a batch in the Disk Bays view

Click on disks to select them and/or click on selected disk to remove them from the batch disk selection. Once the desired disks are selected, click Done in the message toolbar and the selected disks will be added to the new batch.
Alternatively, disks can be added to a batches in one of several ways: