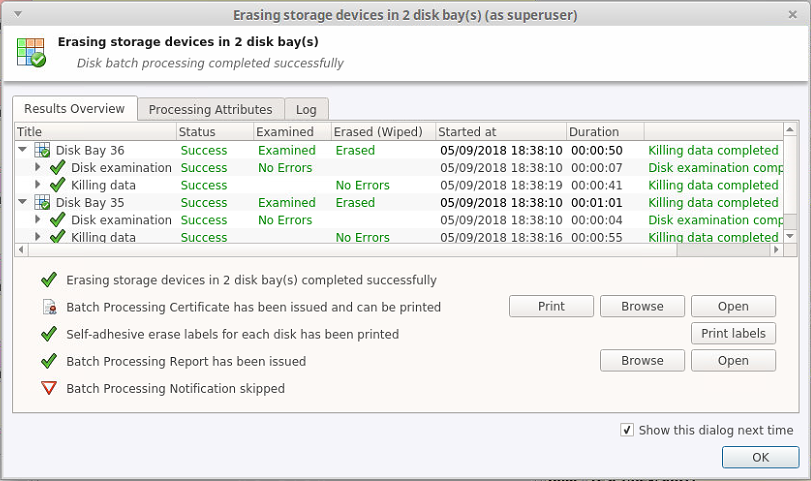
KillDisk is an extremely powerful tool for secure disk erasure. Individual disks or batches of disks can be erased to any desired standard with just a few clicks. The process to achieve this is outlined in this section.
-
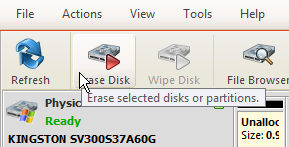
Open Erase disks dialog dialog using one of the following
methods:
- Click the Erase command in the action toolbar
- Click command from main menu
- Click Erase Disk command from context menu
- Click command from toolbar or from Actions main menu to erase disks in predefined disk batch.
Figure: Initiating the Erase operation
-
Confirm erasure options
Disk Erase options dialog pops up:
Figure: Disk Erase Options
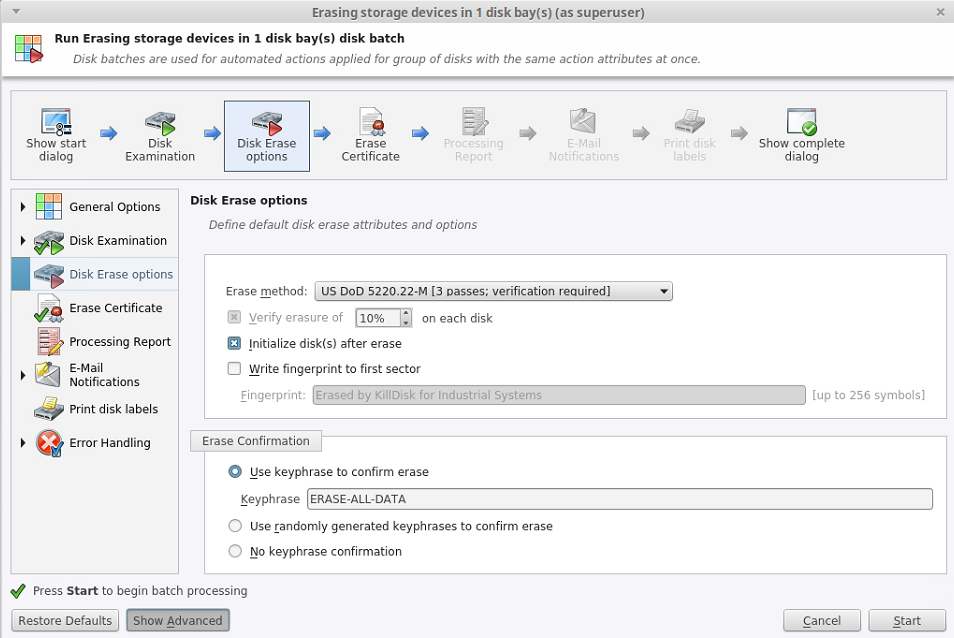
Use tabbed views to adjust disk erasure options if necessary. Available options:
- Disk Examination Options [optional in Industrial & Desktop only]
- Disk Erase Options
- Certificate Options
- Report Options
- Email Notification Options
- Labels Options
- Error Handling Options
Use Disk Examination Options page in application preferences to specify disk grading attributes if necessary.
If single disk is selected for the Erase Disk command, disk area to be erase can be specified:
Figure: Erase Disk - Area Selection
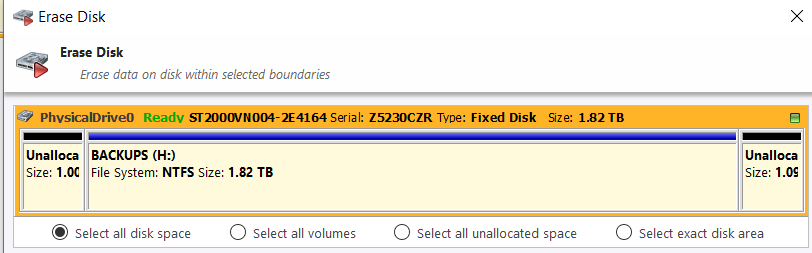
- Select all disk space
- Entire surface of the disk will be erased
- Select all volumes
- Select for erase the only disk's space where live volumes located
- Select all unallocated space
- Select for erase the only disk's unallocated area, the space where no live volumes exist
- Select exact disk area
- Allows you to use the sliders on the visualization of your disk to select a particular range of sectors for erasure.
You may also click on individual partitions and the selected individual partitions will be erased.
Click Start button to go to the final confirmation dialog:
Figure: Disk Erase Confirmation
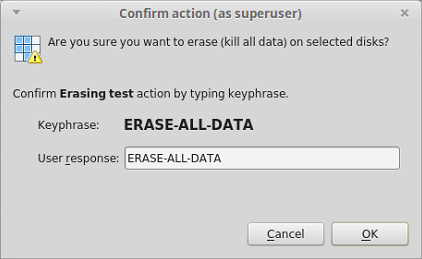
Click OK button to begin disk erase process.
-
Observe erase process
If Disk Examination Options was selected then disk examination will started first. Depending on examination outcome at second stage - disk erase begins.
Once the Erase procedure begins, you will see the disk bay represented as a progress bar and it will show the erase method and progress of that disk operation. The progress bar represents the percentage of data left to erase on the drive, with the corresponding percentage shown. As the procedure progresses, the percentage will decrease, and the red bar will get smaller.
The remaining time will also be seen and progress in the operation will be displayed, as shown below:
Figure: Disk Erase Progress
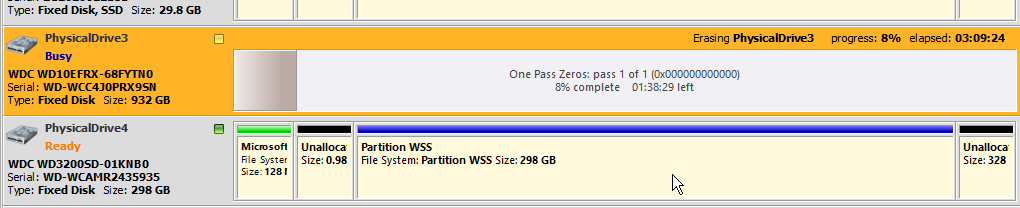
Figure: Disk Erasure in the Disk Bays View

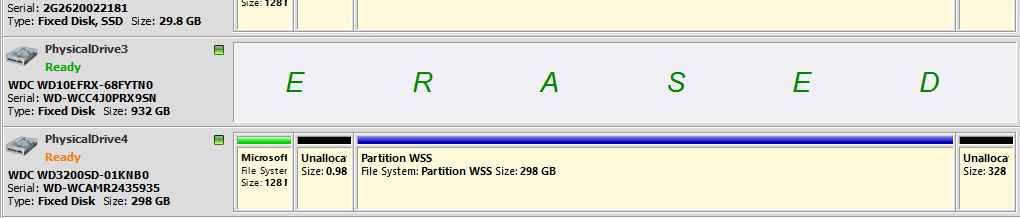
Figure: Disk Erase Completed
If Disk Clone Options was selected then after erase the final stage of this task begins - clone data from source to all successfully erased disks.
Figure: Disk Erase Summary