KillDisk Industrial's Export feature allows to send out all current logs, certificates and reports from locally stored database over the network to the external SQL database. Both local Erase History and all future transactions can be exported after connection to database is established.
Connection to SQL Databases supported:
- Microsoft SQL Server
- ORACLE
- PostgreSQL
- MySQL
- Navigate to or press F10. Then click Database Export tab on the left
- Database Export dialog appears:
Figure: Database Export Dialog
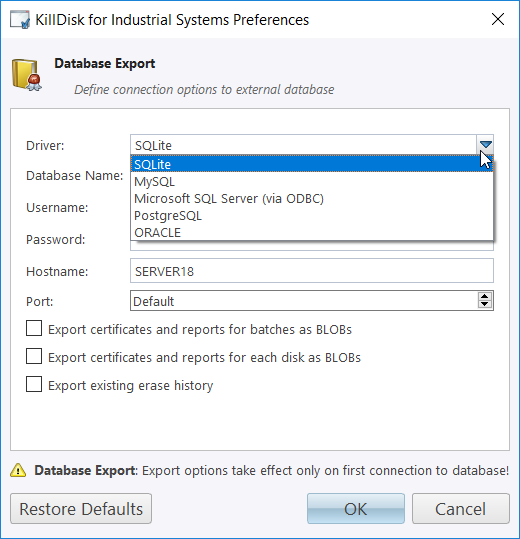
- Select Driver for the particular database you want to connect to from the list of databases
- Type in the Database Name on the remote end
- Type in the database Username for the connection
- Type in the database password for the selected user
- Type in the Hostname (which can be IP address or local Network Server Name)
- Select a TCP/IP Port to use, if it is different from the defaut value for the particular database
- Set check marks, if needed, for the additional export options:
- Export certificates and reports for batches
- Export certificates and reports for particular disks
- Export existing erase history (can be done the only once per a new connection)
- Click OK to test connection and store connection parameters in settings for future use
Once a connection to the external SQL database established, KillDisk Industrial starts exporting all information related to the current operations automatically.
For the database export to be successful you need to provide a database user with privileges enough for creation two tables (DISKS and BATCHES) and populating these tables with current operation's parameters.