Note: Before launching KillDisk make sure that security USB stick is plugged into the any
USB slot on a workstation running the software.
Upon first launching the
application you will encounter the Disk Bay Layout Wizard. Figure: Disk Bay Layout Wizard
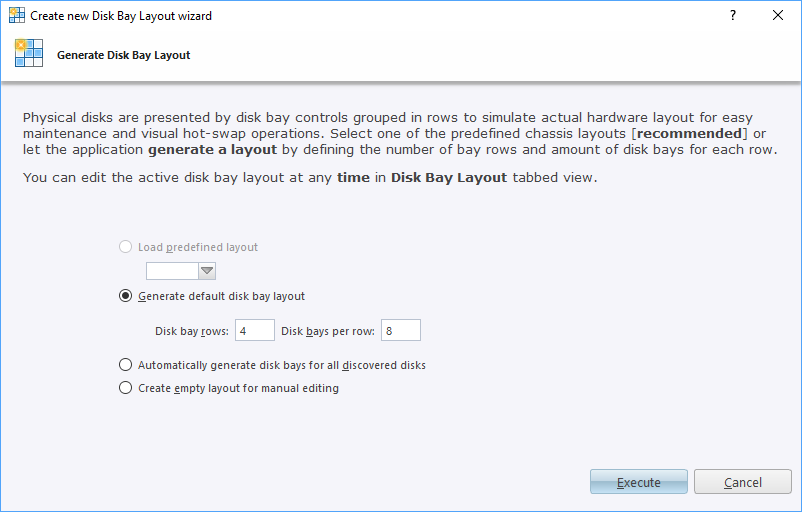
This menu allows you to initialize KillDisk to display your hardware in an intuitive way. To illustrate the purpose of this, read this section on Disk Bay Layouts. This initial configuration can be done in one of three ways:
- Load predefined layout
- Here you can find one of our predefined layouts that may fit your system. If an appropriate layout is not listed, you may try the next option.
- Generate default disk bay layout
- Define your systems in terms of a disk array, arranged in a X by Y grid of disks. You may make adjustments to this later, so this may just be a base to start from.
- Automatically generate disk bays for all discovered disks
- Defines your Disk bay layout based on the disks recognized by your system's device manager. The disks will be placed in their own individual row when the layout is generated.
- Create empty layout for manual editing
- Defines a blank layout with no disks, so they can be added in the Disk Bay Layout window later.