This script is applicable for KillDisk versions 10 and below, the ones using Window Boot Disk based on WinPE 5.1 and earlier versions. If you use KillDisk version 11 and above (Windows Boot Disk uses WinPE version 10), some command line options may not work. If you use version 11 and higher, we recommend you using –ci (-ComputerID) command line option to include unique Computer ID to the certificate. Read help for details.
This document will take you through the steps required to configure Active@ KillDisk so that you may start erasing drives automatically. The best way to automate Active@ KillDisk is prepare two files before creating a bootable CD or USB stick. Once you have created the two files below, you will be able to go on to creating the bootable CD or USB memory stick.
On a standard workstation, install the Active@ KillDisk for Windows (or SUITE Edition). Launch the Active@ KillDisk program and go into settings.
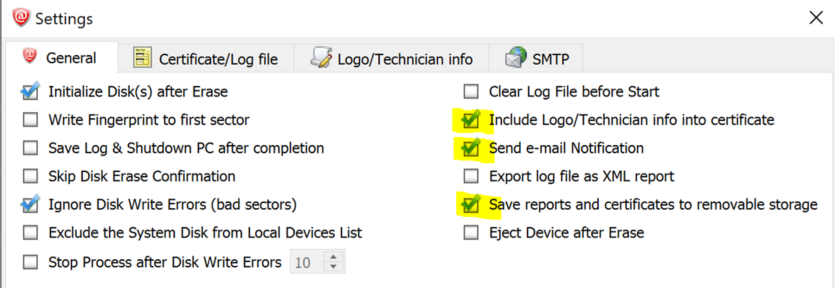
Set the options you want to use in the General Tab. If you want to include Disk Serial Number and Technician Info into the certificate, send email notifications, or save reports to the removable storage - mark the related checkboxes.
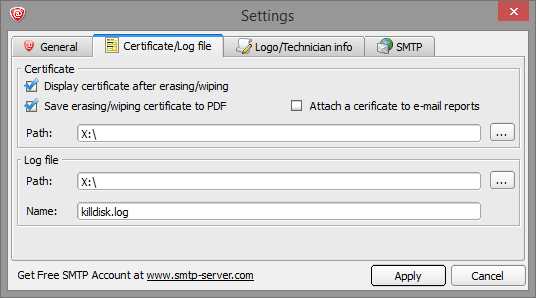
Set the options you want to use for saving the PDF certificate.
It is recommended to save the certificate to the temporary WinPE X:\ volume (RAM Drive).
The certificate file can then be copied to another location once the erasure process is complete.
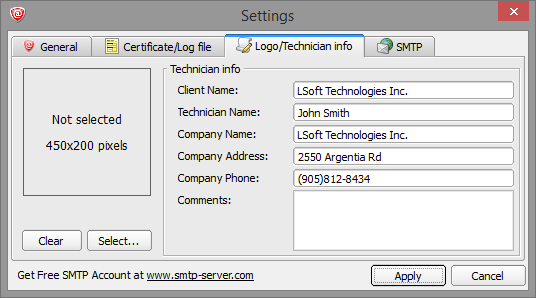
Specify the details of the Company and Technician who is completing the erasure procedure.
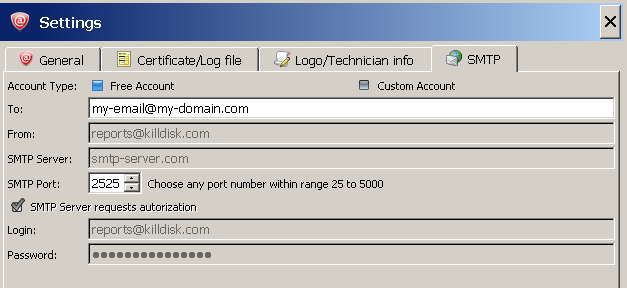
Should you want the certificate emailed, enter the details of the mail server and email account information. Configure the settings that you would like to use and click the Apply button.
Go to the installation folder, for example: C:\Program Files\LSoft Technologies\Active@ KillDisk\ folder and edit the KILLDISK.INI file.
Make sure your settings have been changed. You may want to make some minor adjustments. You should also remove all the lines after (and including) the [Geometry] section. This is not required and can interfere.
Also find and remove the line "logComments=". This will be re-added in again when the script runs.
Make sure the KILLDISK.INI contains "showLogo=true", otherwise the extra Technician info will not be displayed in the certificate.
Save the KILLDISK.INI file to a temp location.
This script is applicable for KillDisk versions 10 and below, the ones using Window Boot Disk based on WinPE 5.1 and earlier versions. If you use KillDisk version 11 and above (Windows Boot Disk uses WinPE version 10), some command line options may not work. If you use version 11 and higher, we recommend you using –ci (-ComputerID) command line option to include unique Computer ID to the certificate. Read help for details.
@ECHO OFF
::Filename: KD-SCRIPT.CMD
::----------------------------------------------------------------------------------
::Sample of the netsh command to assign a static IP address.
::The following command configures the interface named Local Area Connection
::with the static IP address 192.168.0.100, the subnet mask of 255.255.255.0,
::and a default gateway of 192.168.0.1
netsh int ip set address "Ethernet" static 192.168.0.100 255.255.255.0 192.168.0.1 1

::----------------------------------------------------------------------------------
::Mapping a network drive.  To map a drive, you would need to use the
::Windows “Net Use” command to map a drive.
::Usage and Sample of the NET USE command.
::net use [devicename | *] [\\computername\sharename[\volume]] [password | *]] [/user:[domainname\]
net use o: \\LA\Storage password /USER:myAccount

::----------------------------------------------------------------------------------
::Find the volume letter of the bootable media that KillDisk is running from.
::This will search for the KILLDISK.INI on all volumes and then copy the file to a temporary location.
::This needs to be done so that the
FOR %%i IN (c d e f g h i j k l m n o p q r s t u v w x y z) DO IF EXIST %%i:\User_Files\KILLDISK.INI (
SET DrvLtr=%%i
GOTO END )
:END
COPY %DrvLtr%:\User_Files\KILLDISK.INI X:\KILLDISK.INI

::----------------------------------------------------------------------------------
::Get  the Service Tag/Asset number of the system.
::Then a WMI command queries the system to acquire the systems serial number.
::This value is then stored directly into the KILLDISK.INI settings file.
::Once erasure is complete, the PDF certificate will contain all pertinent information of the erase session.
For /f  "skip=1 delims=," %%i in ('wmic bios get serialnumber') do (set "servicetag=%%i")
For /f  "skip=1 delims=," %%i in ('wmic baseboard get serialnumber') do (set "servicetag2=%%i")
ECHO logComments="Bios Serial Number: %servicetag%, Motherboard Serial Number: %servicetag2%">>X:\KILLDISK.INI

::----------------------------------------------------------------------------------
::To append the ServiceTag number into the KILLDISK.LOG file (including date/time stamp),
::you may use the following example.
::This can only be added to the LOG file after KillDisk has finished erasing the hard drive.
ECHO %date% %time:~0,8% ServiceTag#: %servicetag% ServiceTag2#: %servicetag2%>>X:\KILLDISK.LOG

::----------------------------------------------------------------------------------
::Command line parameter to launch KillDisk and complete erasure of the primary hard drive.
::For a list of all KillDisk command line options, please visit this page.
::http://www.killdisk.com/commandline_win.htm
KILLDISK -ip="X:\\" -cp="X:\\" -eh=80h -em=2 -nc -bm


::----------------------------------------------------------------------------------
::You may use a copy command to copy the KillDisk Certificate file and the KILLDISK.LOG file
::from the X:\ (temporary location) to your mapped network drive or to another location
::such as an attached USB Flash memory stick.
COPY X:\*.pdf O:\
COPY X:\KILLDISK.LOG O:\

::----------------------------------------------------------------------------------
:EOF
Launch the "Active@ Boot Disk Creator" program.

In the User's Files section, add the KILLDISK.INI file.
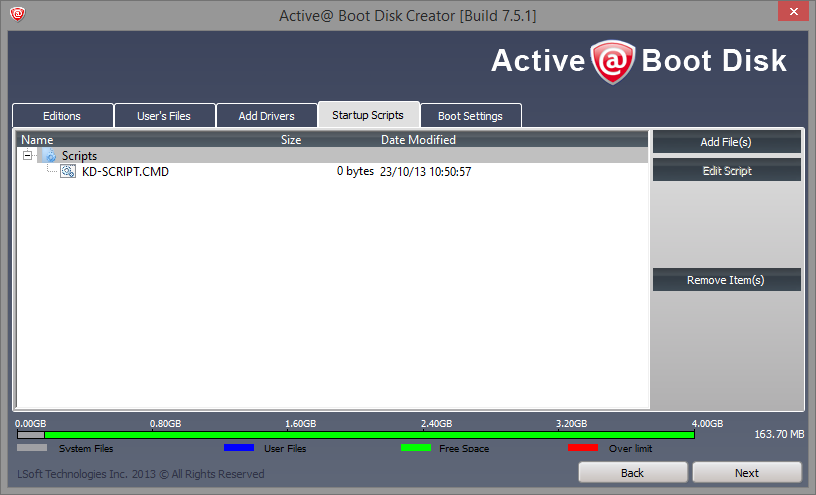
In the Startup Scripts section, add your startup script (.cmd) file.
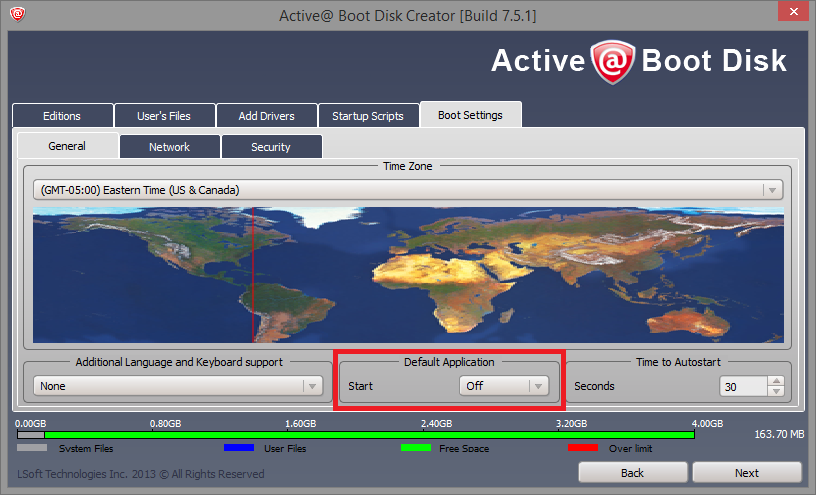
Ensure that you turn off the default application.
Since KillDisk is run in "batch mode", launching the default program is not required.
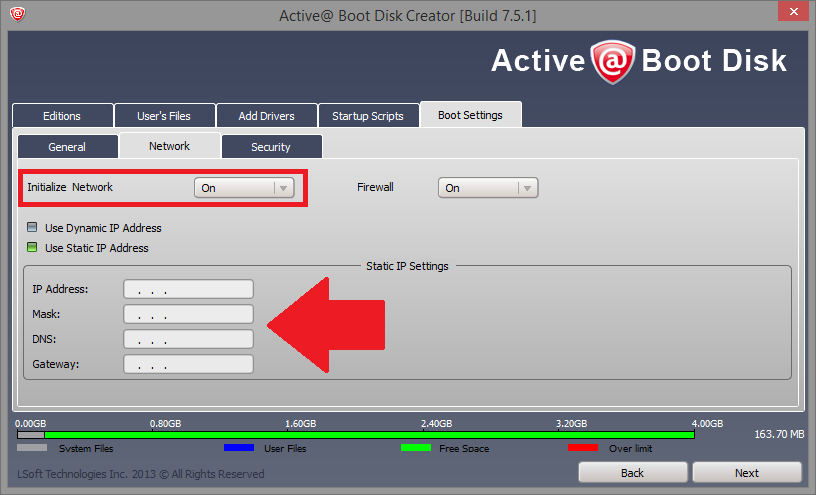
Change the option in the Network tab so that the network interface can be initialized.
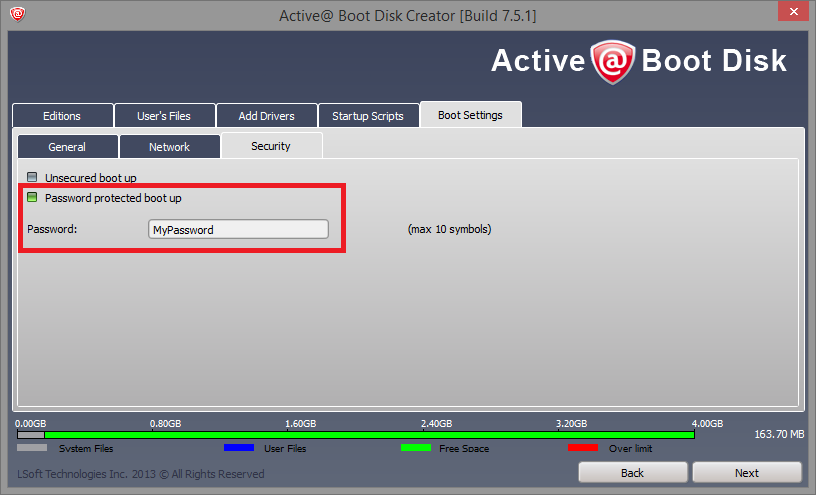
To secure the boot process so only authorized users can perform the erase procedure, specify a password. This is optional and not required, however, setting a password can prevent unauthorized use of the boot environment.
Active@ KillDisk is a portable application so it is possible to simply include the contents of the installation folder into a folder of your own WIM.
Append the registration keys to the SETTINGS.INI file as follows:
SETTINGS.INI
[USER]
Name=[Your registered name]

[REGISTRATION]
Key=[Your registration key]
64bit edition of Active@ KillDisk
The Active@ KillDisk package includes a separate folder which contains the 64bit edition of the software.The default location of this folder is located here:
C:\Program Files\LSoft Technologies\Active@ KillDisk
You may copy the contents of this entire folder and include it into your own WinPE WIM.
IMPORTANT!
If you stop KillDisk from completing the erasure, the automated process will be broken and will not complete properly. To truly test this procedure, modify the KD-SCRIPT.CMD, KillDisk command line options so that it only performs one pass of all zero’s ( -em=0 ). This erase method is quick. When it completes, it will confirm to you that the automation routine has completed successfully. You can always go back and change the command line parameter to use a more secure erase method.
THE FREE DEMO EDITION OF THE SOFTWARE DOES NOT SUPPORT LOGGING TECHNICIAN INFO. YOU MUST USE A REGISTERED EDITION OF THE SOFTWARE FOR THE TECHNICIAN INFO, INCLUDING THE ASSET SERIAL NUMBER, TO APPEAR IN THE PDF CERTIFICATE.

