Once a disk bay layout is created, there are a number of actions that can be performed to format or manipulate the layout and appearance of the disks in the KillDisk application.
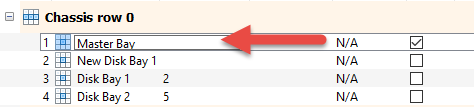
Naming Disk Bays
Figure: Renaming bays
Changing Row and Bay positioning
Configured bay widgets may be moved around to accommodate changes in physical configuration or fix mistakes in creating the layout. This is done quite simply by selecting the bay that needs to be moved, and clicking the Move Bay Up and Move Bay Down buttons. Similarly, bay rows can be manipulated by selecting the row in question and pressing the Move Row Up and Move Row Down buttons.
Adding more Rows and Bays
Click the Add/Insert Row or Add/Insert Bay toolbar buttons to add row or bay at current position.
Deleting Rows and Bays
Click the Delete Row or Delete Bay toolbar buttons to remove row or bay at current position.
Saving and Reverting changes
Click Layout > Revert Layout to revert any changes you made to the layout.