Mapping Network Shares is very useful, especially when booting from a boot disk and running the application in batch mode. It guarantees a specific drive letter to save logs and certificates to, as well as provides a central location for erase reports to be stored.
To map a network share:
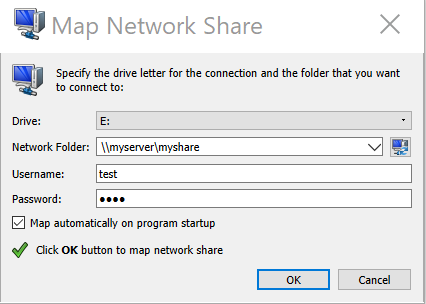
-
Configure your network drive and assign a letter to it, then press
OK
Figure: Mapping a network drive
 Note: KillDisk will identify all connected network drives, so you may use the drop-down list to select the one you'd like to use