Active@ KillDisk for Linux (Console) can be used two ways:
The steps for erasing data and wiping data are similar. Follow steps 1 through 10 and then click the link to complete either the erasing process or the wiping process.
If you are booting from a CD/DVD-ROM drive, check that the drive has boot priority in the BIOS settings of your computer.
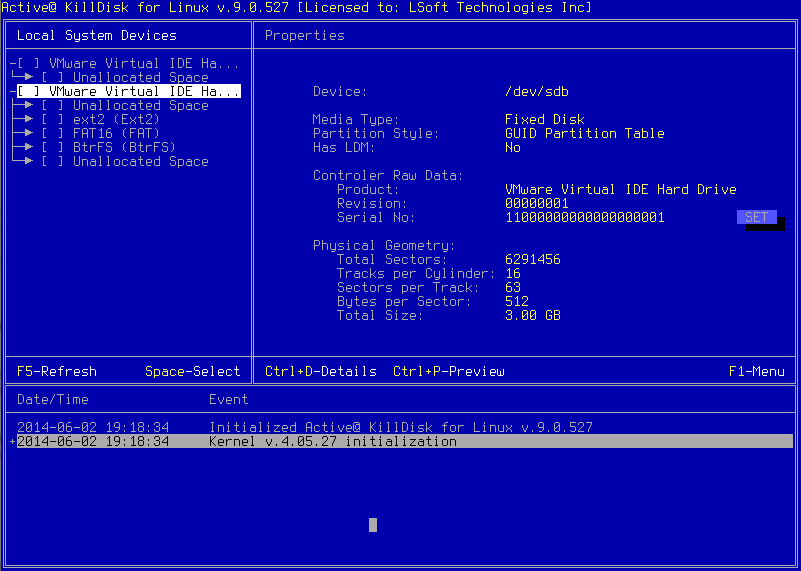
All system physical devices and logical partitions are displayed in a list.
Hard drive devices are numbered by the system BIOS. A system with a single hard drive shows as number /dev/sda. Subsequent hard drive devices are numbered consecutively. For example the second device will be shown as /dev/sdb.
To move a focus between panels (Devices, Properties, Event Log) use TAB and ALT+TAB keys. To display a menu, press F1. To refresh disks, press F5.
Select a device using arrows and read the detailed information about the device in the right pane. Below the device, select a logical partition. The information in the right pane changes.
Be certain that the drive you are selecting is the one that you want to erase or wipe. If you choose to erase, all data will be permanently erased with no chance for recovery.
To preview the sectors on a physical disk or on a volume (logical disk), select it and press CTRL+P, or choose Hex Preview from the View menu. The Hex Preview panel appears.
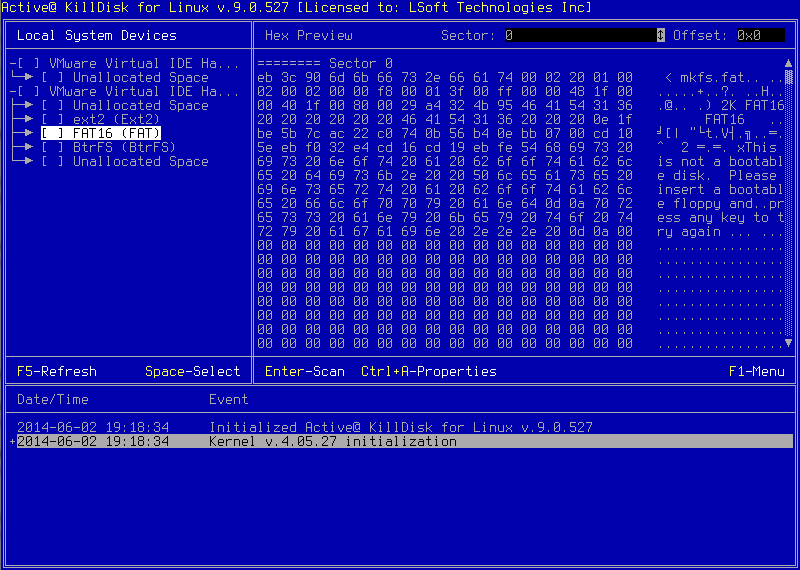
To scroll up and down, use the keyboard navigation arrow keys PAGE UP, PAGE DOWN, HOME and END, or use the related buttons on the toolbar.
To jump to a specific sector, move a cursor to a Sector field and type the sector number, or use arrows. When you are satisfied with the identification of the device, close the Hex Preview panel (CTRL+P or CTRL+F).
To preview the files in a logical disk, select the volume and press ENTER. KillDisk scans the directories for the partition. The Folders and Files screen appears.
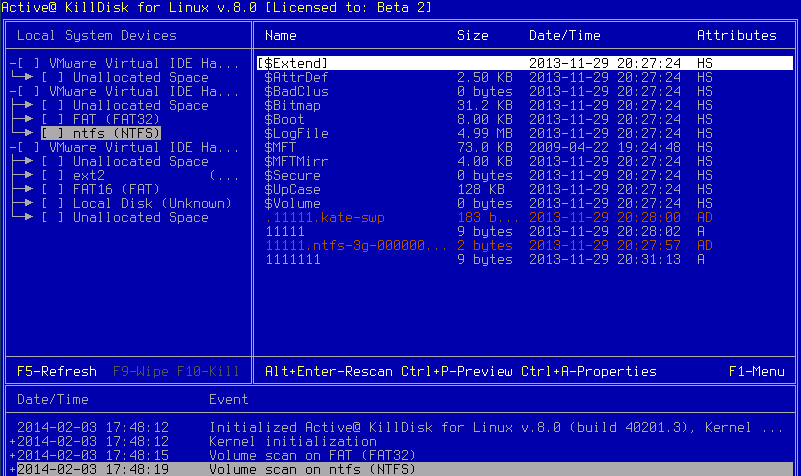
Press TAB to move between panels.
To select an item in the list, use PAGE DOWN, PAGE UP or the up or down arrow keys.
To open a folder, select it and press ENTER. KillDisk scans the system records for this folder. The files in the folder appear in the right panel.
Existing files and folders are displayed in grey color and deleted files and folders are displayed in black. If you are wiping data from unoccupied areas, the black -colored file names are removed after the wiping process completes.
You may use the Hex Preview mode to inspect the work done by the wiping process. After wiping, the data in these areas and the places these files hold in the root records or other system records are gone.
|
This document is available in PDF format,
|

