Once a disk bay layout is created, there are a number of actions that can be performed to format or manipulate the layout and appearance of the disks in the KillDisk application.
Locking Disks
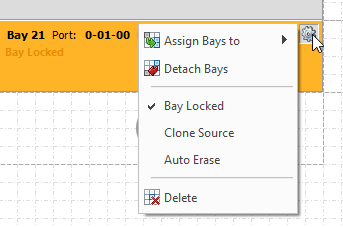
In order to prevent accidental deletion of important disks, KillDisk supports locking of disks. Once a disk is locked, no write operations are allowed to be performed on the drive. To do this, simply find the disk that needs to be locked and execute Bay Locked menu command from the Change disk bay attributes drop down menu..
Figure: Locking a disk to prevent accidental destruction
Locking Clone Source
Disks that are planned to be used as master copy for Disk Cloning could be marked in disk bay layout by selecting disk bay and clicking Clone Source from the Change disk bay attributes drop down menu. Thus disks marked this way will be protected from accidental destruction and also will be available in list devices as source for disk cloning.
Auto Erase
Auto Erase feature designed to speed up disk wiping process in scenario when many disks must be erased with the same erase attributes with less user interaction. When disk is inserted in a bay marked as Auto Erase then disk erase procedure will start without any introduction or confirmation dialogs. However you will see 30 seconds countdown started on disk bay about to be erased and may cancel this action by selecting disk bay widget and clicking Stop button in view's toolbar or in context menu.
Figure: Enabling Auto Erase
Saving and Reverting changes
Click Cancel button to revert any changes you made to the layout.