Secure Erase
Most of Solid State Drives (SSD) support Secure Erase for the low-level purging of all memory blocks on the media. KillDisk is able use SATA Secure Erase feature and perform fast unrecoverable erasure. By doing this, you can increase the performance of SSDs for future use. All of the data will be lost without recovery options. Before using this feature make sure user fully understands the concepts.
100% FATAL DAMAGE GUARANTEED TO MEDIA IF THE PROCESS INTERRUPTED (POWER OUTAGE, UNAUTHORIZED SSD EXTRACTION, ETC.)
Make sure your hardware setup is safe from sudden lost of power.
Do not interrupt the process of Secure Erase in any manner!
If there is a need to erase ALL data (existing and deleted) from the hard drive device permanently with sanitation standards (US DoD 5220.22-M, Canadian OPS-II, NSA 130-2, etc.) use Disk Erase feature.
Secure Erase is available for Linux-based packages only (KillDisk Industrial, Active@ KillDisk Linux, KillDisk Console and KillDisk LiveCD in Active@ KillDisk Ultimate).
Secure Erase is not available in Windows-based packages, including applications running under Active@ Boot Disk (which is based on WinPE). For security reasons Microsoft intentionally blocked IOCTL_ATA_PASS_THROUGH function in all the latest Windows editions starting from Windows 8.
Secure Erase complete process is described below.
-
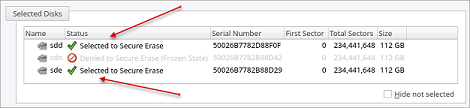
Select SSD disks
Select disks marked as
 in
view. You may select multiple disks to be erased simultaneously.
in
view. You may select multiple disks to be erased simultaneously. -
Confirm options
Use tabbed views to adjust secure erase preferences if necessary.
Available preferences are:
Warning:In case if SSD which state is Frozen has been selected for Secure Erase the following message appears:
Figure 1: Frozen SSD Warning 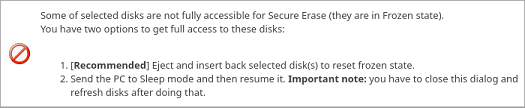
You have options either to eject and insert back the SSD, or send PC to Sleep mode and resume it back to get full access to the disk and proceed with a Secure Erase.
-
Observe progress
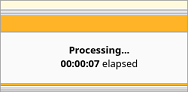
There is no progress indicator and Stop action available for the Secure Erase. The feature is implemented inside SSD controller.
The only time elapsed is available and can be displayed.
After Secure Erase process is completed the Processing Summary dialog appears:
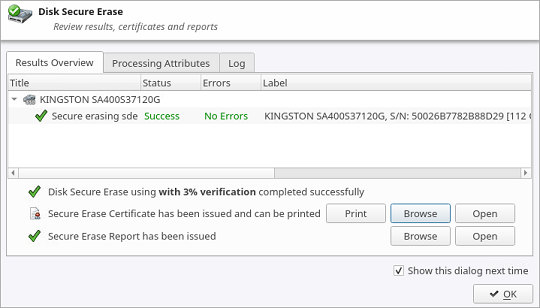
Now you may Print and Open Erase Certificate and work with XML Reports.
If there are any errors they will be reported.